Introduction
As the seasons shift and the air turns crisp, there's nothing quite as comforting as a freshly baked treat. Cozy Apple Kringle, a delightful pastry, captures the essence of autumn with its fragrant apple filling and flaky dough. Ideal for family gatherings or a quiet evening at home, this recipe offers a perfect way to bring the warm aromas of cinnamon and baked apples into your kitchen.
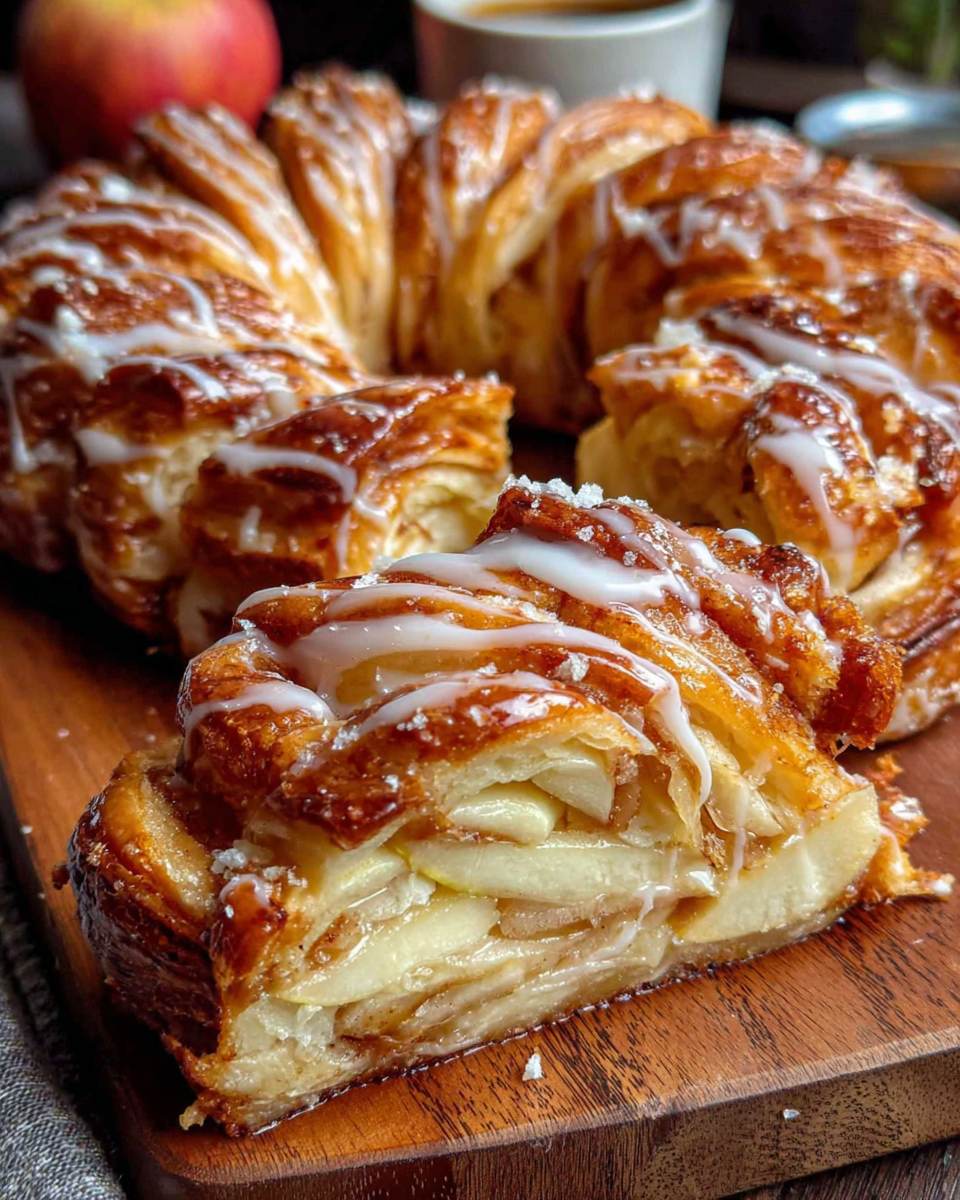
The key to a successful kringle lies in its balance of textures and flavors. With a tender dough that envelops a spiced apple filling, every slice is a delicious blend of sweet and tart. Topped with a smooth vanilla glaze, this pastry elevates any occasion, making it not just a treat, but a warm hug on a plate. Gather your ingredients and let’s dive into this cozy baking adventure.
Ingredients
- 2 cups all-purpose flour
Essential for creating the structure of the dough. The flour gives the pastry its tender texture and forms the base for the Kringle. - 1/4 teaspoon salt
Enhances the flavors in the dough. A little salt helps to balance the sweetness, bringing out the best in the pastry. - 1 tablespoon sugar
Adds a touch of sweetness to the dough itself, providing a slight contrast to the apple filling. - 1/2 cup unsalted butter, cold and cubed
Crucial for achieving a flaky texture. The cold butter creates layers in the dough as it bakes. - 1/4 cup sour cream
Adds moisture to the dough and a bit of tanginess that complements the sweetness of the glaze and filling. - 1 teaspoon vanilla extract
Infuses the dough with warm, aromatic notes that enhance the overall flavor of the Kringle. - 2 to 3 medium apples, peeled and diced
The star of the filling, apples provide sweetness and a comforting texture. Choose a mix of sweet and tart varieties for depth. - 1/2 cup brown sugar
Brings a rich sweetness and caramel notes to the filling, enhancing the natural flavors of the apples. - 1 teaspoon cinnamon
Offers a warm, fragrant spice that pairs beautifully with apples and captures the cozy essence of fall. - 1 tablespoon lemon juice
Prevents the apples from browning and adds a hint of acidity to balance the sweetness. - 1 cup powdered sugar
Used in the glaze for sweetness. Its fine texture creates a smooth finish that adds a delightful contrast to the warm pastry. - 2 tablespoons milk
Adjusts the consistency of the glaze, making it pourable while keeping it rich and creamy. - 1/2 teaspoon vanilla extract (for glaze)
Enhances the flavor of the glaze, tying all the sweet notes together in harmony.
Directions & Preparation
Step 1: Preheat your oven to 375°F (190°C).
Starting with a preheated oven ensures that your pastry cooks evenly from the moment it enters. This step is crucial for achieving a golden crust on your Kringle. Make sure to allow enough time for the oven to reach the right temperature before placing your pastry inside.
Step 2: In a mixing bowl, combine flour, salt, and sugar.
Mixing these dry ingredients together first helps to evenly distribute the salt and sugar throughout the flour. This foundational step is important for creating a uniform dough, ensuring that every bite of your kringle has a balanced sweetness and flavor.
Step 3: Cut in the cold butter until the mixture resembles coarse crumbs.
This step incorporates the butter into the dry ingredients, creating a flaky texture. The key is to work quickly, maintaining the cold temperature of the butter, which prevents it from melting and ensures the development of a light, flaky pastry once baked.
Step 4: Stir in sour cream and vanilla extract until just combined.
Adding sour cream not only enriches the dough but also keeps it moist. Be careful not to overmix; you want the dough to hold together without becoming tough. The vanilla boosts the overall flavor of your Kringle, making it aromatic and inviting.
Step 5: Form the dough into a disk, wrap it in plastic, and refrigerate for at least 30 minutes.
Chilling the dough allows the gluten to relax and the butter to solidify again, both of which are crucial for creating a tender pastry. This resting period enhances flavor development and makes the dough easier to roll out later.
Step 6: Prepare the apple filling by mixing diced apples, brown sugar, cinnamon, and lemon juice.
Tossing the apples with brown sugar and spices creates a luscious filling that will caramelize beautifully during baking. The lemon juice not only adds a touch of brightness but also prevents oxidation, keeping your apples fresh and vibrant.
Step 7: Roll out the chilled dough on a lightly floured surface into a large rectangle.
Rolling the dough to an even thickness is essential for uniform baking. Aim for about 1/4-inch thickness to ensure that the pastry cooks thoroughly while still being tender. The shape you create will also allow for a beautiful presentation.
Step 8: Spread the apple filling evenly down the center of the dough.
By placing the filling in the center, you create a space where the dough can be wrapped around the apples, forming the signature Kringle shape. Be careful not to overfill as this can lead to leakage during baking.
Step 9: Fold the edges of the dough over the filling, creating a sealed log.
Sealing the edges properly ensures that the filling stays intact while baking. This step also contributes to the overall shape and structure of your Kringle, making it visually appealing and easy to slice.
Step 10: Transfer to a greased baking sheet and cut slits in the top for steam.
Cutting slits allows steam to escape while baking, preventing the pastry from becoming soggy. This technique also creates an aesthetically pleasing pattern on top of the Kringle, showcasing the delicious filling inside.
Step 11: Bake in the preheated oven for 25-30 minutes, or until golden brown.
Observing the color change during baking is key to knowing when your Kringle is ready. A beautiful golden crust not only indicates doneness but also enhances the flavor through caramelization. Keep a close eye to avoid over-baking.
Step 12: While the Kringle cools, prepare the vanilla glaze by whisking powdered sugar, milk, and vanilla extract.
Creating the glaze while the Kringle cools helps to ensure that the glaze does not harden too quickly. Whisking until smooth ensures a delightful pour that will beautifully coat the top of your Kringle, adding both taste and visual appeal.
Step 13: Drizzle the glaze over the cooled Kringle and allow it to set.
Allowing the glaze to set creates an inviting presentation and rich texture. A well-drizzled glaze not only enhances the appearance but also adds a sweet finish to each slice, complementing the warm spices and apples beautifully.
Step 14: Slice, serve, and enjoy your cozy apple kringle!
This final step is where all your hard work pays off. Serve warm for the best texture and flavor, and watch as your family and friends delight in this comforting treat. Each bite should evoke the warmth of home and the joy of shared moments.

Choosing the Right Apples for Your Kringle
When selecting apples for your Cozy Apple Kringle, consider using a blend of sweet and tart varieties. Classic choices like Honeycrisp, Granny Smith, and Fuji balance flavor and texture perfectly. Tart apples provide a refreshing sharpness that complements the sweetness of brown sugar, while sweet apples contribute to a luscious filling. Don't be afraid to mix different types for a complex taste!
Tips for Flaky Pastry Perfection
Achieving a flaky Kringle starts with cold ingredients and careful mixing. Ensure your butter is well-chilled and cut into the flour until the texture resembles coarse crumbs. Additionally, avoid overworking the dough; it's crucial to keep those buttery pockets intact. This technique creates layers that puff beautifully in the oven, resulting in a tender, flaky crust that’s simply irresistible.
Adjusting the Sweetness of Your Glaze
If you find your vanilla glaze to be too sweet, consider adding a bit more milk or a splash of lemon juice to balance it out. This adjustment not only alters the sweetness but can also add a touch of brightness that enhances the flavors. Experiment to find the perfect consistency and flavor profile that works for you, ensuring your glaze complements rather than overwhelms the pastry.
FAQs
What should I do if my dough is too sticky?
If your dough feels too sticky, try adding a bit more flour one tablespoon at a time. This will help achieve the right consistency without compromising texture.
Can I use a different type of filling?
Absolutely! While apples are traditional, you can substitute with fruits like pears or berries for a different flavor profile. Just adjust the spices to match.
What if my glaze is too thick to drizzle?
If your glaze ends up too thick, gradually add a teaspoon of milk until you reach your desired pouring consistency. This will help create an inviting look on the Kringle.
How can I tell if my Kringle is overcooked?
Look for a deep golden color on the crust. If it’s very dark or has developed cracks, it may be slightly overcooked. Baking until just golden ensures optimal flavor and texture.
What can I do if my filling leaks during baking?
To minimize leaks, ensure your filling is not overly wet and properly sealed within the dough. If leakage occurs, you can safely collect it on the baking sheet while it cooks.
How do I make my Kringle more aromatic?
You can enhance the aroma by adding spices like nutmeg or ginger to the apple filling, or infusing the dough with zest from an orange or lemon for a fresh twist.
Conclusion
Cozy Apple Kringle with Vanilla Glaze is more than just a dessert; it embodies the warmth and joy of gathering together during the cooler months. Each slice serves as a reminder of the simple pleasures of home cooking—deliciously satisfying and deeply comforting.
As you savor this delightful pastry, whether on a chilly evening or at a sunny brunch, take a moment to appreciate the love and effort that goes into homemade treats. This recipe is sure to become a cherished favorite, perfect for sharing with family and friends.
Recipe Card
Notes
Additional serving suggestions: pair with a crisp salad, garlic bread, or roasted seasonal vegetables for balance.
For make-ahead, prep components separately and assemble just before heating to preserve texture.
Taste and adjust with acid (lemon/vinegar) and salt right at the end to wake up flavors.


