Introduction
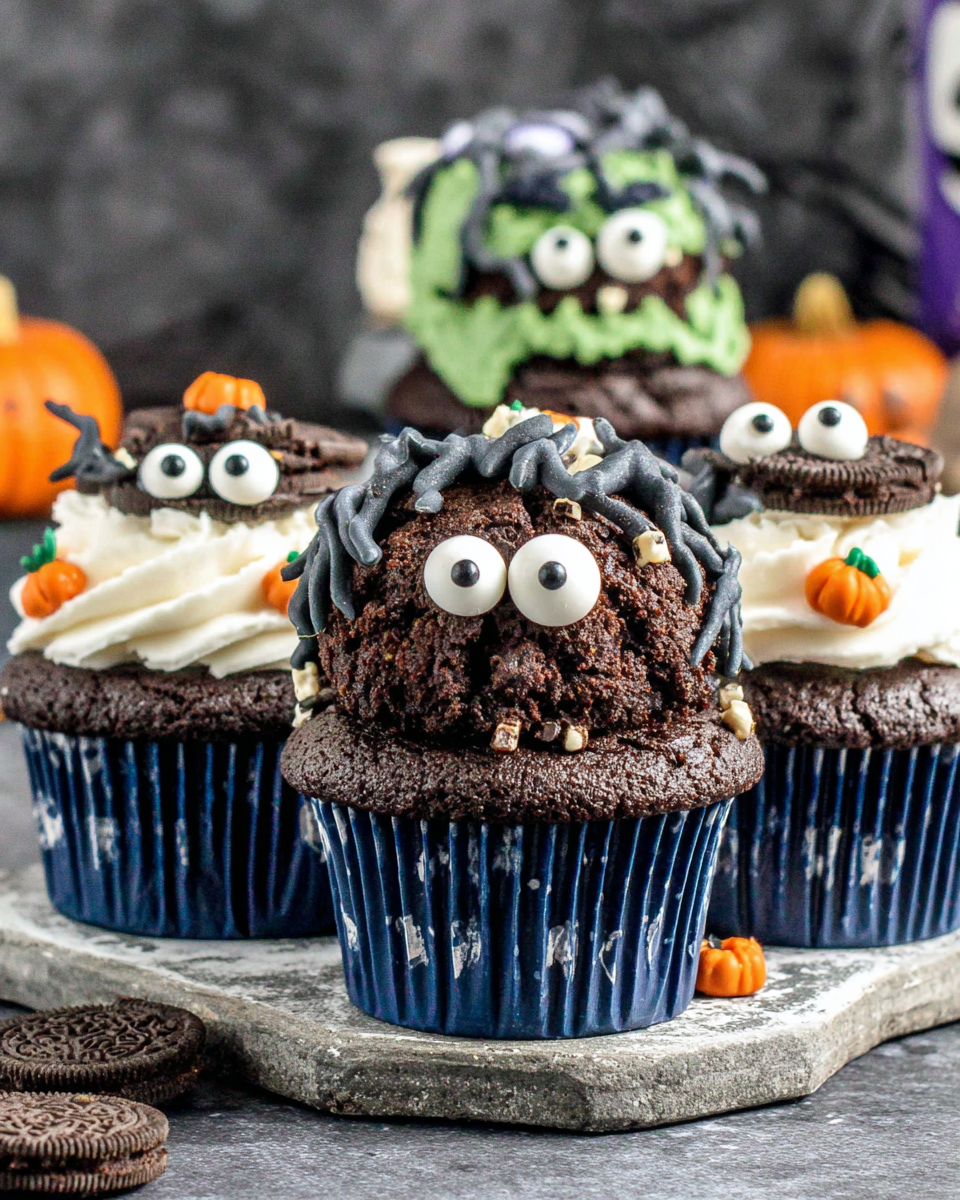
If you need a reliable Zombie cupcakes
that works on a busy night, this version keeps the steps short and the flavor high. It uses pantry staples and a few smart cues, so you know exactly when to stir, simmer, and serve. You do not need special tools or fancy skills—just follow the signs and you will get a cozy, homey result.
Good heat brings sweetness from onions and browning builds savory depth without bitterness. Salt sharpens flavor while a touch of acid at the end makes everything taste brighter. If the sauce feels thick, add a splash of liquid; if it feels thin, simmer a minute longer.
Benefits of This Recipe
The method is simple, the ingredient list is sensible, and the results are repeatable. It scales up for family or down for one, and it takes well to the swaps in the Variations section. Cleanup is easy because most of the cooking happens in one pan.
Good heat brings sweetness from onions and browning builds savory depth without bitterness. Salt sharpens flavor while a touch of acid at the end makes everything taste brighter. If the sauce feels thick, add a splash of liquid; if it feels thin, simmer a minute longer.
- Fast, weeknight-friendly method.
- Pantry ingredients and clean flavors.
- Flexible swaps for protein, veg, and heat level.
- Scales for family or meal prep.
- Consistent results using visual cues.
Ingredients
- 1 box chocolate cake mix (plus ingredients listed on box)
- 1 cup red jam or strawberry preserves (for 'bloody' filling)
- 1 cup unsalted butter, softened
- 3-4 cups powdered sugar
- 2-3 tablespoons milk
- 1 teaspoon vanilla extract
- Green food coloring
- Black food coloring (optional, for darker green)
- Candy zombie toppers, candy eyes, or gummy body parts
- Chocolate cookie crumbs (for 'dirt')

Instructions
- Prepare cupcakes according to package directions using chocolate cake mix. Cool completely.
- Use a small knife or cupcake corer to cut out the center of each cupcake. Fill with red jam and replace the top piece.
- In a large bowl, beat butter until creamy. Gradually add powdered sugar, milk, and vanilla until frosting is fluffy.
- Tint frosting with green food coloring (add a touch of black for a spooky green).
- Frost cooled cupcakes with green frosting. Dip edges into chocolate cookie crumbs to create a 'dirt' effect.
- Decorate with candy zombie hands, candy eyes, or gummy body parts sticking out of the frosting.
- Optional: drizzle extra red jam on top for a gory effect!
Tips for Success
Do not rush the aromatics; let them soften until sweet before you add liquids. Avoid crowding the pan so moisture can escape and browning can happen. Taste before serving and adjust salt, acid, and heat to your liking.
Good heat brings sweetness from onions and browning builds savory depth without bitterness. Salt sharpens flavor while a touch of acid at the end makes everything taste brighter. If the sauce feels thick, add a splash of liquid; if it feels thin, simmer a minute longer.
- Soften aromatics until sweet before adding liquids.
- Avoid overcrowding to keep browning active.
- Finish with salt or acid for balance.
Variations
- Protein: chicken, turkey, tofu, beef, or mushrooms.
- Lighter: olive oil for butter, extra stock for body.
- Spicy: red pepper flakes, cayenne, or harissa.
- Gluten-free: GF pasta or serve over rice.
- Low-carb: zucchini noodles or cauliflower rice.
FAQs
Can I make this ahead of time?
Yes—cool fully and store airtight up to 3 days. Reheat gently with a splash of stock or water.
How do I store leftovers?
Refrigerate up to 3 days. Reheat on low and refresh seasoning to taste.
Can I freeze this recipe?
Most versions freeze up to 2 months. Thaw in the fridge overnight, then reheat gently.
What if my sauce is too thin or too thick?
Reduce briefly to thicken; loosen with stock, pasta water, or milk if too thick. Adjust salt and acid.
Conclusion
This recipe is weeknight friendly, flexible, and built around dependable cues. It gives you control without stress and delivers the comfort people expect. Serve it with a simple salad or crusty bread and dinner is done.
Do not rush the aromatics; let them soften until sweet before you add liquids. Avoid crowding the pan so moisture can escape and browning can happen. Taste before serving and adjust salt, acid, and heat to your liking.
Recipe Card
Best Zombie cupcakes Recipe (Easy, Step-by-Step)
Ingredients
- 1 box chocolate cake mix plus ingredients listed on box
- 1 cup red jam or strawberry preserves for 'bloody' filling
- 1 cup unsalted butter softened
- 3-4 cups powdered sugar
- 2-3 tablespoons milk
- 1 teaspoon vanilla extract
- Green food coloring
- Black food coloring optional, for darker green
- Candy zombie toppers candy eyes, or gummy body parts
- Chocolate cookie crumbs for 'dirt'
Instructions
- Prepare cupcakes according to package directions using chocolate cake mix. Cool completely.
- Use a small knife or cupcake corer to cut out the center of each cupcake. Fill with red jam and replace the top piece.
- In a large bowl, beat butter until creamy. Gradually add powdered sugar, milk, and vanilla until frosting is fluffy.
- Tint frosting with green food coloring (add a touch of black for a spooky green).
- Frost cooled cupcakes with green frosting. Dip edges into chocolate cookie crumbs to create a 'dirt' effect.
- Decorate with candy zombie hands, candy eyes, or gummy body parts sticking out of the frosting.
- Optional: drizzle extra red jam on top for a gory effect!
Notes & Serving Suggestions
Good heat brings sweetness from onions and browning builds savory depth without bitterness. Salt sharpens flavor while a touch of acid at the end makes everything taste brighter. If the sauce feels thick, add a splash of liquid; if it feels thin, simmer a minute longer.
Do not rush the aromatics; let them soften until sweet before you add liquids. Avoid crowding the pan so moisture can escape and browning can happen. Taste before serving and adjust salt, acid, and heat to your liking.
This recipe is weeknight friendly, flexible, and built around dependable cues. It gives you control without stress and delivers the comfort people expect. Serve it with a simple salad or crusty bread and dinner is done.


