Introduction
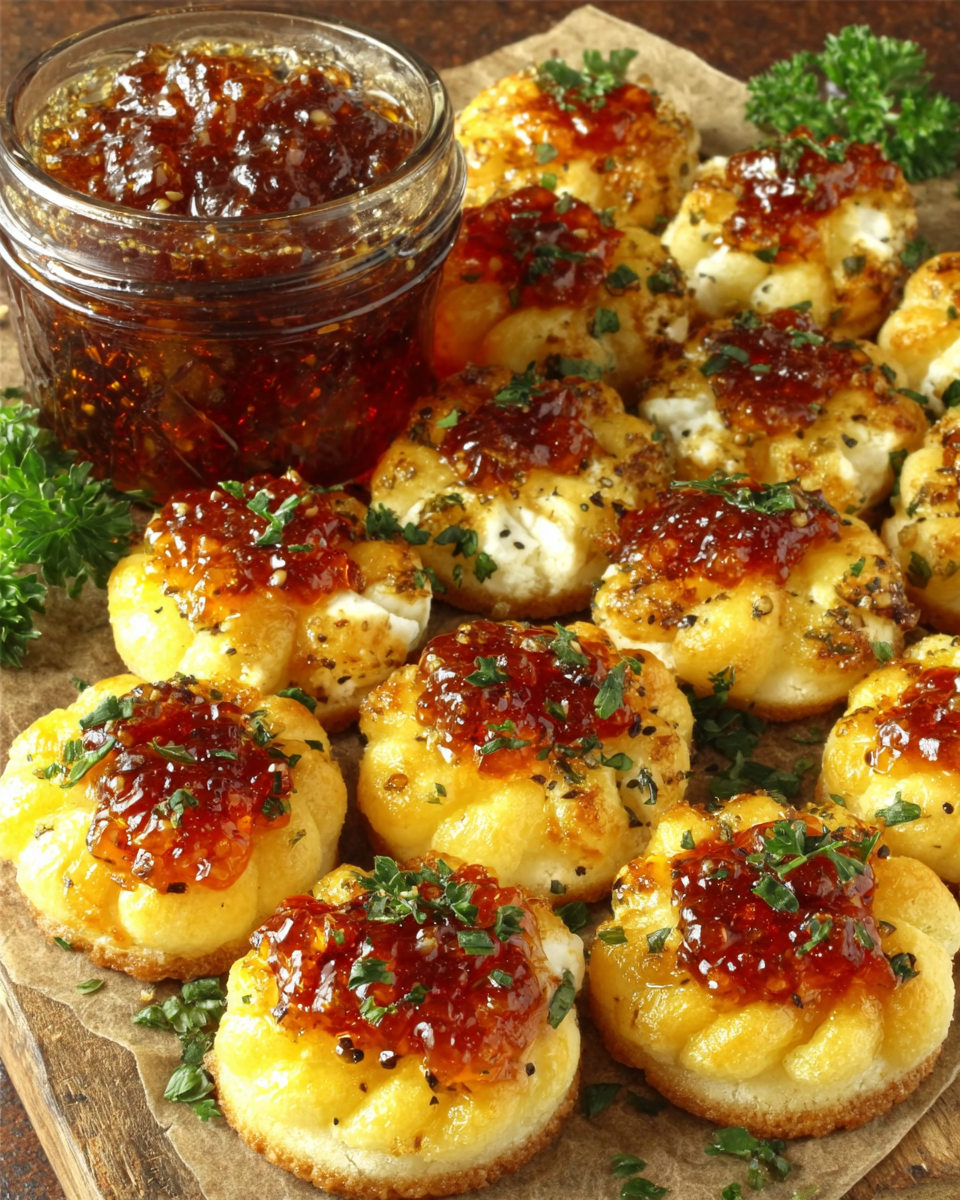
There’s something undeniably delightful about mingling cheese and a bit of heat for an appetizer that tantalizes the taste buds. These Cheesy Thumbprint Appetizers filled with hot pepper jelly offer a perfect blend of creamy and fiery flavors while being simple to prepare. Perfect for parties or casual gatherings, they are bound to impress your guests.
What sets these bites apart is their charming presentation and burst of flavor in every bite. Whether you're a novice in the kitchen or a seasoned home cook, making these appetizers is accessible and fun. Plus, they can easily be customized to suit your favorite cheese or jelly.
Ingredients
- 1 cup shredded sharp cheddar cheese
The star of this dish, sharp cheddar offers a rich, tangy flavor that combines beautifully with the sweetness of the jelly. Its meltability ensures a gooey texture, perfect for the thumbprint. - 1/2 cup cream cheese, softened
Bringing creaminess and a subtle tang, cream cheese helps bind the ingredients together while ensuring a smooth filling that encourages harmonious melting. - 1/4 cup all-purpose flour
Flour acts as a stabilizer, giving structure to the cheesy mixture and helping hold everything together during the baking process. - 1/2 teaspoon garlic powder
Garlic powder adds a layer of warmth and depth to the flavor, elevating the overall taste of the cheesy filling without being overpowering. - 1/4 teaspoon black pepper
Black pepper adds a touch of mild heat, enhancing the flavors without distracting from the main ingredients. - 1/2 cup hot pepper jelly
This sweet and spicy jewel becomes the surprise element when nestled in the center. The jelly’s flavor contrasts with the cheesiness, creating a delightful explosion of taste. - Fresh herbs for garnish (optional)
Herbs like chives or parsley not only heighten the visual appeal but also provide a fresh, herbal note that balances the richness of the cheese.
Directions & Preparation
Step 1: Preheat your oven to 350°F (175°C).
Preheating the oven is crucial, as it ensures the cheesy bites cook evenly and achieve the right texture. This step creates a consistent temperature which is vital for achieving that cheesy melt and golden turn.
Step 2: In a large mixing bowl, combine the cheddar cheese and cream cheese until well blended.
Mixing these cheeses together creates a smooth, cohesive mixture that will be the core of your thumbprints. Ensuring even blending avoids patches of un-melted cheese and brings a uniform flavor to your bites.
Step 3: Add the flour, garlic powder, and black pepper to the cheese mixture.
Incorporating dry ingredients like flour and spices at this stage ensures even distribution throughout your cheesy mix. This step helps in building the flavor profile and gives the appetizers stability.
Step 4: Scoop teaspoon-sized portions of the mixture and roll into balls.
This step creates the base for your thumbprints. Ensuring uniformity in size not only allows for even cooking but also guarantees that each guest receives a consistent flavor experience.
Step 5: Place the cheese balls on a baking sheet lined with parchment paper.
Lining the baking sheet prevents sticking and makes cleaning up easier after baking. Spacing the balls allows for even heat circulation, ensuring they cook uniformly and achieve a lovely texture.
Step 6: Using your thumb, make an indentation in the center of each cheese ball.
The thumbprint is where the magic happens, providing a pocket for the hot pepper jelly. This step is vital for the presentation and functionality of the appetizer.
Step 7: Fill each thumbprint with a generous dollop of hot pepper jelly.
Adding the jelly at this stage introduces a contrasting sweet heat that becomes beautifully gooey as it bakes. Making sure to not overfill prevents overflow but ensures a delicious burst of flavor.
Step 8: Bake for 15-18 minutes or until edges are golden and the cheese is bubbly.
Monitoring the baking time is key to achieving a perfect texture. Overbaking can lead to dryness, while underbaking might result in an unappetizing gooey texture. Look for that tempting golden edge.
Step 9: Remove from the oven and allow to cool for a few minutes before garnishing.
Cooling slightly allows the cheese to set, making it easier to transfer. Garnishing with fresh herbs enhances the visual appeal and adds a refreshing taste that balances the dish.
Step 10: Serve warm and enjoy with friends and family!
Serving these cheesy bites warm enhances the melty cheesiness and bright flavors of the jelly, creating a delightful appetizer experience. Encourage sharing and conversation around this delicious treat.

A Twist on Classic Flavors
Infusing your appetizers with hot pepper jelly adds not just sweetness but also a unique kick that elevates a traditional cheese-filled treat. This unexpected twist is perfect for adventurous palates and transforms the familiar into something exciting, making these bites a hit at every gathering.
Versatile Flavor Combinations
Feel free to experiment with different cheese blends or jelly flavors to personalize these appetizers. From pepper jack for added heat to fruit jellies like apricot or raspberry, the possibilities are as vast as your creativity. Each variation can create a distinct flavor profile, ensuring there’s something for everyone.
The Perfect Party Snack
Cheesy Thumbprint Appetizers with Hot Pepper Jelly aren’t just delicious; they’re visually appealing and easy to stand around and snack on. Their hand-held nature is ideal for parties, allowing guests to mingle and nibble without formal dining. Plus, their bold flavors spark conversation and are a delightful addition to any appetizer spread.
FAQs
What can I do if my cheese mixture is too thick?
If your mixture feels too thick to scoop, try adding a tablespoon of cream cheese at a time until it reaches a more manageable consistency.
Can I use different types of jelly for variety?
Absolutely! Feel free to substitute with your favorite fruit jellies or even spicy salsas for a unique flavor experience.
What should I do if the thumbprint doesn't hold its shape?
If your thumbprint is collapsing, ensure your cheese mixture has enough flour mixed in, as this helps stabilize the shape while baking.
How can I tell if the cheese is properly melted?
Look for a bubbly, slightly browned texture on the edges; this is the perfect indication that the cheese has melted beautifully.
What kind of cheese combinations work well together?
Combining cheeses like Gruyère for nuttiness or mozzarella for stretchiness with cheddar creates layered, complex flavors.
What are some creative serving suggestions for these appetizers?
Consider serving on a platter with toothpicks for easy eating, or place them alongside a fresh herb salad for a vibrant presentation.
Conclusion
Crafting Cheesy Thumbprint Appetizers with Hot Pepper Jelly is a straightforward yet rewarding experience. These bites are more than just appetizers—they are an expression of flavor that will captivate your guests.
Whether it's a cozy gathering or a festive celebration, these cheesy creations will without a doubt become a beloved fixture at your next event. Embrace the joy of cooking and enjoy every delicious bite!
Recipe Card

Deliciously Tender Crockpot Turkey Breast Recipe
Ingredients
- 4-5 lbs turkey breast
- 1 cup chicken broth
- 2 tablespoons olive oil
- 2 teaspoons garlic powder
- 2 teaspoons dried thyme
- 1 teaspoon salt
- 1 teaspoon black pepper
- 1 teaspoon paprika
Instructions
- Prepare the turkey breast
- Season the turkey
- Heat the olive oil
- Add turkey to the crockpot
- Cook on low heat
- Check for doneness
- Let it rest
- Slice and serve
Notes
Additional serving suggestions: pair with a crisp salad, garlic bread, or roasted seasonal vegetables for balance.
For make-ahead, prep components separately and assemble just before heating to preserve texture.
Taste and adjust with acid (lemon/vinegar) and salt right at the end to wake up flavors.


