
Introduction
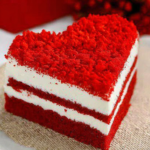
Valentine's Day is a special occasion that calls for a dessert as memorable as the love you celebrate. This Valentine's Heart Red Velvet Cake is not only visually stunning but also rich in flavor, making it the perfect centerpiece for your romantic dinner. Each slice reveals a luscious red interior paired beautifully with cream cheese frosting.
The bright red color, combined with the soft texture and subtle cocoa flavor, creates an irresistible cake that symbolizes passion and sweetness. Baking this cake allows you to infuse your kitchen with love, as the aromas wafting through will set the perfect mood for your celebration.
Ingredients
- 2 1/2 cups all-purpose flour
All-purpose flour provides the structure needed for the cake. It allows the cake to rise properly while maintaining a tender crumb, ensuring your Red Velvet Cake is soft and fluffy. - 1 1/2 cups granulated sugar
Sugar not only sweetens the cake but also contributes to the moisture content. It caramelizes during baking, creating a delightful crust that enhances flavor while keeping the cake moist. - 1 teaspoon baking soda
Baking soda acts as a leavening agent. It reacts with the acidic buttermilk in the recipe, allowing the cake to rise and developing a light, airy texture that is essential for a perfect Red Velvet. - 1 teaspoon baking powder
This ingredient works alongside baking soda to provide additional lift. It helps ensure the cake rises evenly, preventing a dense or flat result. - 1 teaspoon salt
Salt enhances the flavors of all the ingredients in the cake. It balances the sweetness and rounds out the overall taste, making each bite more satisfying. - 1 teaspoon cocoa powder
Cocoa powder contributes a slight chocolate flavor and helps develop the distinctive red color when paired with red food coloring. It significantly enhances the depth of flavor. - 1 cup vegetable oil
Vegetable oil keeps the cake moist and tender, making it more palatable. It also helps to create a smoother batter, ensuring better mixing and an airy final product. - 1 cup buttermilk
Buttermilk adds moisture and tenderness to the cake. The acidity reacts with baking soda to create a light and fluffy texture while lending a subtle tang that balances sweetness. - 2 large eggs
Eggs act as a binder and leavener. They provide structure and stability to the cake, while the proteins help it rise during baking. - 2 tablespoons red food coloring
This ingredient is what gives Red Velvet Cake its signature vibrant color. The food coloring amplifies the visual appeal of the cake, perfect for a romantic occasion. - 1 teaspoon vanilla extract
Vanilla enhances the overall flavor profile by adding warmth and complexity. A good quality extract can elevate the cake's taste significantly. - 1 cup cream cheese (for frosting)
Cream cheese serves as the base for the frosting, providing richness and a tangy flavor that perfectly complements the sweetness of the cake. - 1/2 cup unsalted butter (for frosting)
Butter adds creaminess and structure to the frosting, making it spreadable and giving it a rich flavor that harmonizes with the cake. - 4 cups powdered sugar (for frosting)
Powdered sugar is used to sweeten the frosting while providing a desired texture. It helps create a smooth, spreadable consistency without being overly grainy. - 1 teaspoon vanilla extract (for frosting)
Just as in the cake, vanilla extract in the frosting enhances flavor, adding an aromatic quality that ties all elements together.
Directions & Preparation
Step 1: Preheat your oven to 350°F (175°C).
Preheating the oven ensures that your cake bakes evenly and at the right temperature from the start. An adequately heated oven helps achieve the desired rise and texture.
Step 2: In a bowl, sift together flour, cocoa powder, baking soda, baking powder, and salt.
Sifting the dry ingredients mixes them thoroughly and aerates the flour, preventing clumps. This step enhances the texture of your cake and ensures an even distribution of leavening agents.
Step 3: In a separate large bowl, mix together the granulated sugar and vegetable oil until well combined.
Combining sugar and oil creates a batter that is well-emulsified, which is critical in making sure the cake's texture remains moist and tender during baking.
Step 4: Add the eggs one at a time, mixing well after each addition.
Incorporating eggs gradually helps them emulsify properly into the mixture. This step ensures even distribution of moisture and creates a uniform cake structure.
Step 5: Mix in the buttermilk and vanilla extract, followed by the red food coloring until combined.
Adding buttermilk and vanilla ensures moistness and flavor, while red food coloring gives the cake its characteristic hue. This mixture should be homogenous for an even bake.
Step 6: Gradually add the dry ingredients to the wet ingredients until just combined, being careful not to overmix.
Mixing too much can create a dense cake. Stir until the ingredients are barely combined to maintain a lighter texture in the finished product.
Step 7: Divide the batter evenly into prepared cake pans.
Dividing evenly ensures that each layer bakes uniformly. Use a kitchen scale for precision if needed, allowing for an even baking time across all layers.
Step 8: Bake for 25-30 minutes, until a toothpick inserted into the center comes out clean.
This step is crucial for determining doneness. Keep an eye on the cakes towards the end of the baking time to avoid overbaking, which can dry out the cake.
Step 9: Allow the cakes to cool in the pans for 10 minutes before transferring them to a wire rack.
Cooling in pans allows the cakes to set, reducing the risk of breaking during transfer. A wire rack promotes even cooling, preventing sogginess.
Step 10: Prepare the cream cheese frosting by beating cream cheese, butter, powdered sugar, and vanilla extract until smooth.
Creating a smooth frosting ensures easy spreading. Beating the mixture well incorporates air, resulting in a light and fluffy frosting for your cake.
Step 11: Once the cakes are completely cooled, frost the top of one layer, then place the second layer on top and frost the top and sides.
Frosting each layer helps to seal in moisture while creating a beautiful finish. Ensure the cakes are completely cooled to prevent the frosting from melting.
Step 12: Decorate as desired and serve at room temperature for best flavor.
Serving at room temperature allows the flavors of both the cake and frosting to shine. Visual decoration adds a special touch for the occasion.

The Significance of Red Velvet
Red Velvet Cake is more than just a dessert; it embodies romance and elegance, making it ideal for Valentine's Day. The deep red hue symbolizes love, while its velvety texture offers a luxurious mouthfeel. This cake has a rich history that traces back to the Victorian era and became popular in the American South, enchanting couples with its unique flavor and color, perfect for expressing affection.
Creating the Perfect Frosting
A silky smooth cream cheese frosting perfectly complements the richness of Red Velvet Cake. Balancing the frosting's sweetness with the tanginess of cream cheese enhances the overall flavor profile. To achieve the ideal consistency, it's essential to ensure that both the cream cheese and butter are at room temperature before mixing. This thoughtful preparation ensures your frosting spreads effortlessly and tastes divine.
Serving Suggestions and Pairings
When serving your Valentine's Heart Red Velvet Cake, think about pairing it with a glass of milk or a scoop of vanilla ice cream for an indulgent dessert experience. Fresh berries or a dusting of cocoa powder can enhance its visual appeal and add some tartness. For an adults-only pairing, consider serving with a sweet red wine or a dark roast coffee, elevating your romantic dinner to a whole new level.
FAQs
What should I do if my batter is too thick?
If your batter feels too thick, you can add a tablespoon of buttermilk at a time to achieve a smoother consistency. Be sure to stir gently, allowing the liquid to integrate without overmixing.
My cake layers turned out too thin, what went wrong?
Thin layers can occur if the batter is divided unevenly or if the baking time was too short. Make sure to evenly portion the batter and check for doneness with a toothpick.
What can I use to decorate the cake?
You can use chocolate shavings, fresh berries, or edible flowers to create an eye-catching presentation. A drizzle of chocolate ganache also adds a rich contrast to the bright red.
Why did my cake come out dry?
A dry cake may result from overbaking or not including enough moisture in the batter. Always check your cake a few minutes before the suggested baking time to ensure moistness.
Can I make mini heart cakes instead?
Absolutely! You can use heart-shaped mini cake pans to create individual portions. Adjust the baking time accordingly, checking for doneness to avoid overbaking.
What if I want a less sweet frosting?
To reduce the sweetness of the frosting, you can decrease the amount of powdered sugar slightly and add more cream cheese or butter. Tasting along the way will help you achieve the right balance.
Conclusion
Baking a Valentine's Heart Red Velvet Cake is a heartfelt way to show your affection. With every layer, you not only create a visually stunning dessert but also a delicious experience to share with someone special. The blend of flavors and textures in this cake will surely delight your loved one.
As you slice into this rich, velvety treat, remember the love and energy you poured into making it. Celebrate your bond with this delicious creation, making your Valentine's Day all the more memorable.
Recipe Card
Delightful Valentine's Heart Red Velvet Cake Recipe
Ingredients
- 2 1/2 cups all-purpose flour
- 1 1/2 cups granulated sugar
- 1 teaspoon baking soda
- 1 teaspoon baking powder
- 1 teaspoon salt
- 1 teaspoon cocoa powder
- 1 cup vegetable oil
- 1 cup buttermilk
- 2 large eggs
- 2 tablespoons red food coloring
- 1 teaspoon vanilla extract
- 1 cup cream cheese for frosting
- 1/2 cup unsalted butter for frosting
- 4 cups powdered sugar for frosting
- 1 teaspoon vanilla extract for frosting
Instructions
- Preheat your oven to 350°F (175°C).
- In a bowl, sift together flour, cocoa powder, baking soda, baking powder, and salt.
- In a separate large bowl, mix together the granulated sugar and vegetable oil until well combined.
- Add the eggs one at a time, mixing well after each addition.
- Mix in the buttermilk and vanilla extract, followed by the red food coloring until combined.
- Gradually add the dry ingredients to the wet ingredients until just combined, being careful not to overmix.
- Divide the batter evenly into prepared cake pans.
- Bake for 25-30 minutes, until a toothpick inserted into the center comes out clean.
- Allow the cakes to cool in the pans for 10 minutes before transferring them to a wire rack.
- Prepare the cream cheese frosting by beating cream cheese, butter, powdered sugar, and vanilla extract until smooth.
- Once the cakes are completely cooled, frost the top of one layer, then place the second layer on top and frost the top and sides.
- Decorate as desired and serve at room temperature for best flavor.
Notes
Additional serving suggestions: pair with a crisp salad, garlic bread, or roasted seasonal vegetables for balance.
For make-ahead, prep components separately and assemble just before heating to preserve texture.
Taste and adjust with acid (lemon/vinegar) and salt right at the end to wake up flavors.


