Introduction
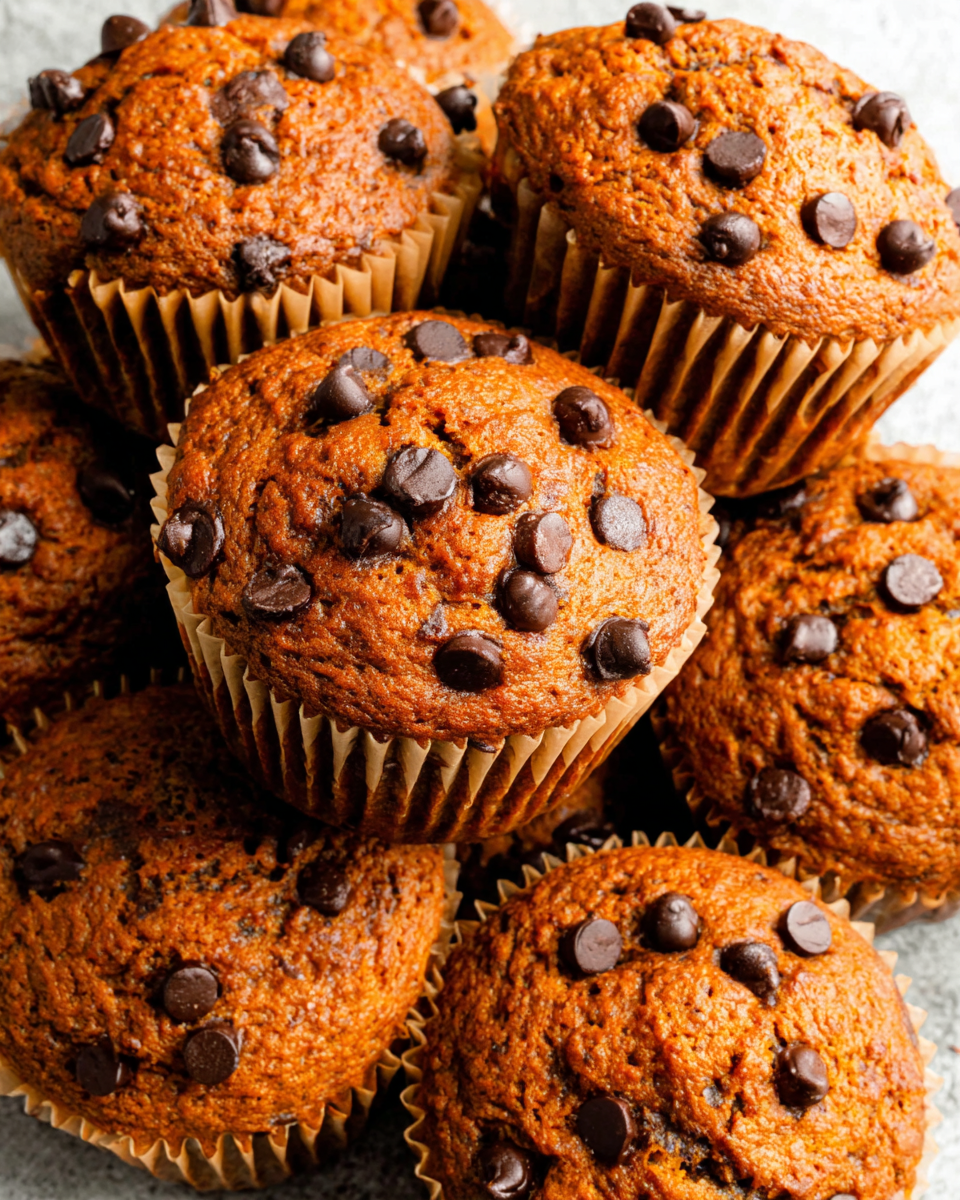
Pumpkin chocolate chip muffins are a delightful treat that perfectly marry the flavors of fall with a hint of sweetness. These muffins not only embrace the cozy essence of pumpkin spice but also bring the richness of chocolate into the mix, making them irresistible.
For those following a gluten-free diet, these muffins are the answer to your cravings. Made with gluten-free flour, they maintain a moist and fluffy texture that rivals any traditional muffin. Enjoy them for breakfast, as a snack, or even a dessert!
Let’s dive into this wonderful recipe that will make your kitchen smell heavenly as the muffins bake. These treats are simple to whip up and perfect for sharing with family and friends.
Ingredients
- 1 cup pumpkin puree
Pumpkin puree adds moisture and a rich flavor to the muffins. It's also packed with nutrients like vitamins A and C. - 2 large eggs
Eggs provide structure and stability to the muffins, helping them rise and maintain their shape while adding a bit of richness. - 1/2 cup brown sugar
Brown sugar contributes to the sweetness and adds a subtle molasses flavor that complements the pumpkin perfectly. - 1/4 cup honey
Honey offers a natural sweetness and a unique flavor profile while also helping to keep the muffins moist. - 1/2 cup melted coconut oil
Coconut oil adds healthy fats and moisture, enhancing the tenderness of the muffins without overpowering the flavor. - 1 1/2 cups gluten-free all-purpose flour
This blend mimics the properties of wheat flour, providing the necessary structure without gluten, ensuring a soft texture. - 1 teaspoon baking powder
Baking powder helps the muffins rise, creating a light and airy texture that is essential for good muffins. - 1/2 teaspoon baking soda
Baking soda acts as a leavening agent, reacting with the acidic components in the recipe to help create a fluffy muffin. - 1 teaspoon pumpkin pie spice
This spice mix infuses the muffins with warm, aromatic flavors associated with fall, elevating the pumpkin's natural taste. - 1/2 teaspoon salt
Salt enhances the sweetness and overall flavor of the muffins, balancing the ingredients for a more rounded taste. - 1 cup chocolate chips
Chocolate chips add sweetness and indulgence, creating a delightful contrast to the pumpkin, making each bite a treat.
Directions & Preparation
Step 1: Preheat the oven to 350°F (175°C).
Preheating the oven is essential for ensuring even baking. If the oven isn’t at the correct temperature when you put the muffins in, they may not rise properly, resulting in a dense texture.
Step 2: In a large mixing bowl, combine pumpkin puree, brown sugar, honey, melted coconut oil, and eggs.
Mixing these wet ingredients together first helps integrate the flavors and creates a uniform base for your muffins. This combination of sweeteners will not only sweeten your muffins but also contribute to their moistness.
Step 3: In a separate bowl, whisk together gluten-free flour, baking powder, baking soda, pumpkin pie spice, and salt.
Whisking the dry ingredients ensures that the leavening agents are evenly distributed throughout the flour. This step is crucial for achieving consistent texture and rising in the muffins.
Step 4: Gradually fold the dry mixture into the wet mixture until just combined.
Folding the dry ingredients into the wet ingredients helps to maintain the air bubbles created in the wet mixture, which is necessary for the muffins to rise properly. Overmixing can result in a tough texture.
Step 5: Gently stir in the chocolate chips.
Adding chocolate chips at this stage allows them to be evenly distributed throughout the batter. You'll want to do this carefully to ensure the chips don’t break down too much.
Step 6: Spoon the batter into a lined muffin tin, filling each cup about 2/3 full.
Filling each cup appropriately ensures that the muffins have enough room to rise without overflowing. Lining the tin also helps with easy removal after baking.
Step 7: Bake for 20-25 minutes or until a toothpick inserted comes out clean.
The baking time is crucial. Start checking at the 20-minute mark, as overbaking can lead to dry muffins. The toothpick test is a reliable method to check doneness without wasting a muffin.
Step 8: Allow the muffins to cool in the tin for 5 minutes before transferring to a wire rack.
Cooling in the tin helps the muffins to set and makes it easier to remove them without breaking. Transferring to a wire rack allows them to cool evenly and prevents sogginess on the bottom.

Utilizing Pumpkin Puree in Baking
Pumpkin puree is more than just a seasonal ingredient; it's a powerhouse for both flavor and nutrition. Its natural moistness means that you can bake with less fat compared to traditional recipes. In gluten-free baking, pumpkin acts as a wonderful binder, ensuring that everything holds together without the aid of gluten.
Choosing the Right Gluten-Free Flour
When selecting gluten-free flour for your muffins, look for a blend that includes xanthan gum or is specifically formulated for baking. This blend ensures a texture that closely resembles traditional flour, providing the necessary structure while ensuring that your end product rises beautifully and isn’t crumbly.
Variations to Explore with Your Muffins
Feel free to get creative with your pumpkin chocolate chip muffins! Consider adding nuts like pecans or walnuts for some crunch, or swap chocolate chips for white chocolate or even dried fruit for a different flavor profile. Each variation can take this delicious muffin to new heights, making them perfect for any palate.
FAQs
What can I do if the batter seems too thick?
If your batter is too thick, try adding a tablespoon of milk or water. This can help achieve the desired consistency without compromising the flavor.
Can I substitute honey with maple syrup?
Yes, maple syrup can be used as a direct substitute for honey, giving the muffins a different but equally delicious flavor.
What if my muffins come out too dense?
If the muffins are dense, you may have overmixed the batter or not added enough leavening agents. Ensure to mix until just combined and check the freshness of your baking powder and soda.
How can I ensure my chocolate chips don’t sink?
To prevent sinking, coat the chocolate chips in a little gluten-free flour before folding them into the batter. This helps suspend them more evenly throughout.
Can I use different spices instead of pumpkin pie spice?
Absolutely! A mix of cinnamon and nutmeg can be a great alternative, or even experimenting with chai spice can add another layer of flavor.
What should I do if I want to add more pumpkin flavor?
To intensify the pumpkin flavor, you can increase the amount of pumpkin puree by a couple of tablespoons, but reduce the sugar slightly to maintain balance.
Conclusion
These gluten-free pumpkin chocolate chip muffins are not only simple to make but also incredibly satisfying. With their moist texture and delightful sweetness, they are sure to become a seasonal favorite in your home.
Whether enjoyed fresh out of the oven or saved for later, these muffins offer a delightful way to embrace fall flavors. Get ready to enjoy the comforting tastes and aromas of pumpkin with every bite.
Recipe Card

Sweet and Savory Honey Garlic Chicken Thighs
Ingredients
- 4 chicken thighs
- 1/2 cup honey
- 1/4 cup soy sauce
- 4 cloves garlic minced
- 1 tablespoon apple cider vinegar
- 1 teaspoon ground ginger
- 1 tablespoon cornstarch optional
- Salt and pepper to taste
Instructions
- Prepare the sauce by mixing honey, soy sauce, garlic, ginger, and vinegar.
- Place chicken thighs in the crock pot and season with salt and pepper.
- Pour the honey garlic sauce over the chicken, ensuring it's well coated.
- Cover and cook on low for 6-8 hours or high for 3-4 hours.
- If using cornstarch, remove chicken 30 minutes before cooking is done.
- Once done, shred or serve the chicken whole, alongside the sauce.
Notes
Additional serving suggestions: pair with a crisp salad, garlic bread, or roasted seasonal vegetables for balance.
For make-ahead, prep components separately and assemble just before heating to preserve texture.
Taste and adjust with acid (lemon/vinegar) and salt right at the end to wake up flavors.


