Introduction
Pizza has a universal appeal that transcends cultures and brings people together. Whether it's a quick weeknight dinner or a fun weekend gathering, nothing beats freshly baked pizza dough balls. These bite-sized delights are versatile, easy to make, and ideal for any topping or filling you desire.
Creating your own pizza dough balls allows for a customization that store-bought versions lack. You can play with various flavors, shapes, and even stuffing options. Plus, there's something immensely satisfying about kneading the dough and watching it rise, knowing you created it from scratch.
Ingredients
- 4 cups all-purpose flour
Flour is the backbone of your pizza dough, providing structure and chewiness. The protein content affects the dough's elasticity, which is crucial for shaping and stretching the balls. - 1 ½ cups warm water
Warm water activates the yeast, promoting fermentation and dough rise. The right temperature is essential; too hot can kill the yeast, while too cold might slow down the process. - 2 ¼ teaspoons active dry yeast
Yeast is the leavening agent that causes dough to rise, creating the light and airy texture we associate with pizza. Fresh, active yeast ensures robust fermentation with maximum flavor. - 2 teaspoons salt
Salt not only enhances the flavor but also strengthens the dough's gluten structure. It plays a crucial role in fermentation, regulating yeast activity to create the perfect rise. - 1 tablespoon sugar
Sugar acts as food for yeast, helping it to ferment and create carbon dioxide, which contributes to the dough's rise. It also lends a subtle sweetness that balances the dough's overall flavor. - 2 tablespoons olive oil
Olive oil enriches the dough, adding a soft texture and a hint of flavor. It also helps prevent the dough from becoming too tough and aids in the browning process during baking.
Directions & Preparation
Step 1: Activate the yeast
Start by combining warm water and sugar in a bowl. Sprinkle the yeast on top, letting it sit for about 5-10 minutes until it becomes frothy. This step is crucial as it verifies that your yeast is active and ready to work its magic in the dough. If the mixture doesn’t foam, discard it and start with new yeast to ensure proper fermentation.
Step 2: Mix the dry ingredients
In a large mixing bowl, whisk together the flour and salt. Mixing the dry ingredients first ensures even distribution of the salt, which is important for flavor and dough development. This also creates a well for adding the wet ingredients later, enhancing the mixing process.
Step 3: Combine wet and dry ingredients
Once the yeast mixture is frothy, pour it into the bowl with the flour along with the olive oil. Stir with a wooden spoon or spatula until a shaggy dough forms. This helps incorporate all the elements together, setting the foundation for gluten development that affects the dough's final texture.
Step 4: Knead the dough
Turn the dough out onto a floured surface and knead for about 8-10 minutes, until smooth and elastic. Kneading develops gluten, which is vital for the dough's stretch and chewiness. Aim for a soft but not sticky consistency; add a little flour if it seems too tacky.
Step 5: First rise
Place your kneaded dough in a lightly oiled bowl, cover it with a damp cloth or plastic wrap, and let it rise in a warm spot for about 1-2 hours or until doubled in size. This rising period allows for flavor development and creates a light texture as the yeast ferments.
Step 6: Shape the dough
After rising, punch down the dough to release excess air, then turn it out onto a floured surface. Divide it into equal portions, about the size of a golf ball. Shaping is key to ensuring even cooking and consistent sizes, which promotes a uniform baking experience.
Step 7: Second rise
Place the dough balls on a floured baking tray, cover them loosely, and allow them to rise for another 30-45 minutes. This second rise enhances the texture and flavor, allowing the dough to become even fluffier as it rests.
Step 8: Bake the dough balls
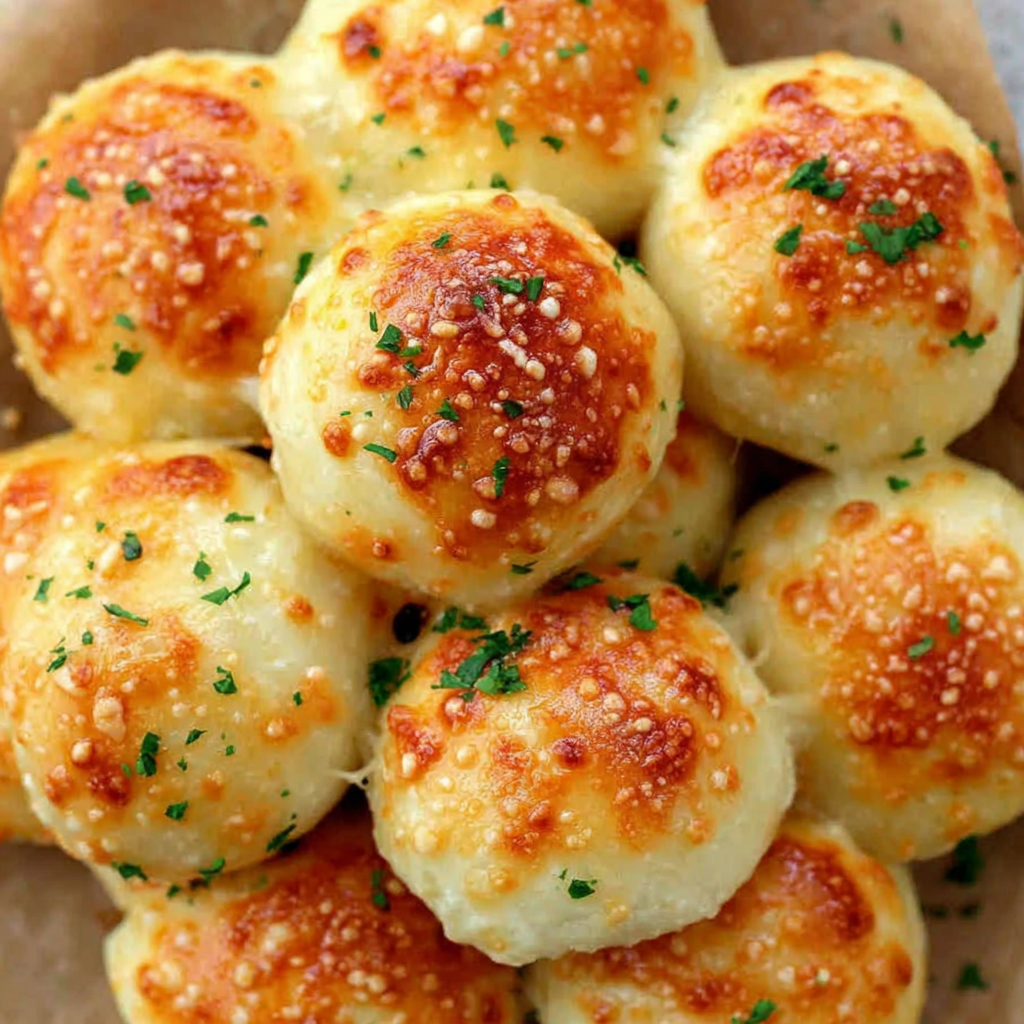
Preheat your oven to 450°F (230°C). Once warmed, bake the dough balls for about 10-12 minutes or until golden brown. Baking at a high temperature creates a crispy exterior while maintaining a soft interior, resulting in the perfect pizza dough ball.

Flavors and Fillings: Get Creative
One of the most exciting aspects of pizza dough balls is their versatility. You can experiment with various flavors, such as adding herbs like oregano or basil directly into the dough. For fillings, consider cheese, cooked meats, or veggies. Just ensure to seal them well before the second rise to prevent leakage during baking.
Pairing and Serving Options
These pizza dough balls serve as a fantastic appetizer or snack when hosting. Pair them with an array of dipping sauces, from marinara to spicy garlic butter. They can also be made into a delightful main course when served alongside a fresh salad or roasted vegetables, adding balance to your meal.
Storing and Reheating Dough Balls
If you have leftovers, store the baked dough balls in an airtight container in the refrigerator for up to a week. To reheat, pop them in a hot oven or microwave until warmed through. This ensures that they regain their original texture and flavor, making for a quick and satisfying snack anytime.
FAQs
What if my dough is too sticky?
If the dough feels too sticky while kneading, sprinkle small amounts of flour until it reaches a smooth consistency. Be careful not to add too much flour, as it can lead to a dense texture.
How can I scale this recipe for larger gatherings?
To scale this recipe, simply multiply the ingredients accordingly based on how many dough balls you need. Keep in mind that you may need to adjust your rising time slightly for larger batches.
What if my dough balls don't rise well?
If your dough balls fail to rise adequately, ensure that the yeast was active and that the dough was placed in a warm, draft-free area. Cooler temperatures can slow yeast activity.
Can I use bread flour instead of all-purpose flour?
Yes, using bread flour will give your dough more protein content, resulting in a chewier texture. However, it may require adjusting the liquid slightly due to the flour's higher absorption.
What should I do if my dough balls are overcooked?
If your dough balls turn out overcooked, it's best to check your oven temperature and baking time. A precise thermometer can help ensure that your oven isn't running hotter than expected.
Can I make mini versions of these pizza dough balls?
Absolutely! Simply divide the dough into smaller portions for mini pizza dough balls. Adjust the baking time accordingly as they will cook faster than standard-sized balls.
Conclusion
Making easy pizza dough balls is a rewarding experience that brings richness to your cooking repertoire. They not only allow for creativity in flavors and fillings but also provide a wonderful way to bond with family and friends over a meal.
So roll up your sleeves, gather your ingredients, and enjoy the amazing transformation from simple components to delectable pizza dough balls. Your next favorite snack or appetizer is just a few steps away!
Recipe Card

Delicious Apple Crumb Cake with Cinnamon Drizzle
Ingredients
- 2 cups all-purpose flour
- 1 teaspoon baking powder
- ½ teaspoon baking soda
- ½ teaspoon salt
- ¾ cup unsalted butter softened
- 1 cup granulated sugar
- 2 large eggs
- 1 teaspoon vanilla extract
- 3 cups peeled and chopped apples
- ½ cup brown sugar
- 1 teaspoon ground cinnamon
- 1 tablespoon milk
Instructions
- Preheat the oven to 350°F (175°C).
- Grease and flour a 9x13 inch baking pan.
- In a mixing bowl, whisk together the flour, baking powder, baking soda, and salt.
- In a separate bowl, cream together the softened butter and granulated sugar until light and fluffy.
- Add the eggs, one at a time, mixing well after each addition, then stir in vanilla extract.
- Gradually add the dry ingredients to the wet ingredients, mixing just until combined.
- Fold in the chopped apples gently.
- Pour the batter into the prepared pan and smooth the top.
- In a separate bowl, combine brown sugar, flour, cinnamon, and butter to make the crumb topping.
- Sprinkle the crumb topping evenly over the batter.
- Bake for 40-45 minutes or until a toothpick comes out clean.
- While the cake cools, prepare the cinnamon apple drizzle by combining powdered sugar, cinnamon, and milk until smooth.
- Drizzle the cinnamon apple mixture over the cooled cake.
Notes
Additional serving suggestions: pair with a crisp salad, garlic bread, or roasted seasonal vegetables for balance.
For make-ahead, prep components separately and assemble just before heating to preserve texture.
Taste and adjust with acid (lemon/vinegar) and salt right at the end to wake up flavors.


