Introduction
Chocolate thumbprint cookies are a timeless favorite, celebrated for their rich cocoa flavor and the delightful surprise of a jam-filled center. These delectable treats are perfect for any occasion, from family gatherings to holiday cookie plates. At In Bloom Bakery, we've crafted a recipe that balances texture and taste, ensuring every bite is both satisfying and memorable.
As you embark on this baking adventure, the beauty of thumbprint cookies lies in their simplicity and the joy of personalization. Whether you prefer raspberry, apricot, or even nut butter, the filling you choose adds a personal touch that makes each cookie uniquely yours. Gather your ingredients and let’s create something special that everyone will love.
Ingredients
- 1 cup all-purpose flour
All-purpose flour provides the structure of the cookie, giving it a delicate crumb. It acts as the backbone of the recipe, allowing the cookies to rise properly while maintaining a chewy texture. - 1/4 cup unsweetened cocoa powder
Cocoa powder delivers the rich chocolate flavor, imparting depth and a beautiful color to the cookies. It also balances the sweetness of other ingredients, rounding out the overall taste. - 1/2 teaspoon baking powder
Baking powder acts as a leavening agent, helping the cookies achieve a light and airy texture. It ensures that the cookies rise well without becoming dense. - 1/4 teaspoon salt
Salt enhances the flavors of the other ingredients, elevating the overall taste of the cookies. It's a crucial component that can often be overlooked but makes a significant difference. - 1/2 cup unsalted butter, softened
Butter adds richness and moisture to the cookies, contributing to a tender texture. The fat from the butter also aids in flavor development as the cookies bake. - 1/2 cup granulated sugar
Granulated sugar sweetens the cookies, promoting a crisp exterior while keeping the middle soft. It helps control the spread of the cookies during baking. - 1/4 cup brown sugar
Brown sugar, with its molasses content, adds moisture and a deeper flavor profile. It enhances the chewiness of the cookies, providing a contrast to the granulated sugar. - 1 large egg yolk
The egg yolk contributes richness and helps bind the ingredients together. It ensures a tender texture while adding a bit of extra flavor. - 1 teaspoon vanilla extract
Vanilla extract provides a warm aromatic note that complements the chocolate. It enhances the overall flavor profile, making the cookies more complex and enjoyable. - 1/2 cup fruit jam (like raspberry or apricot)
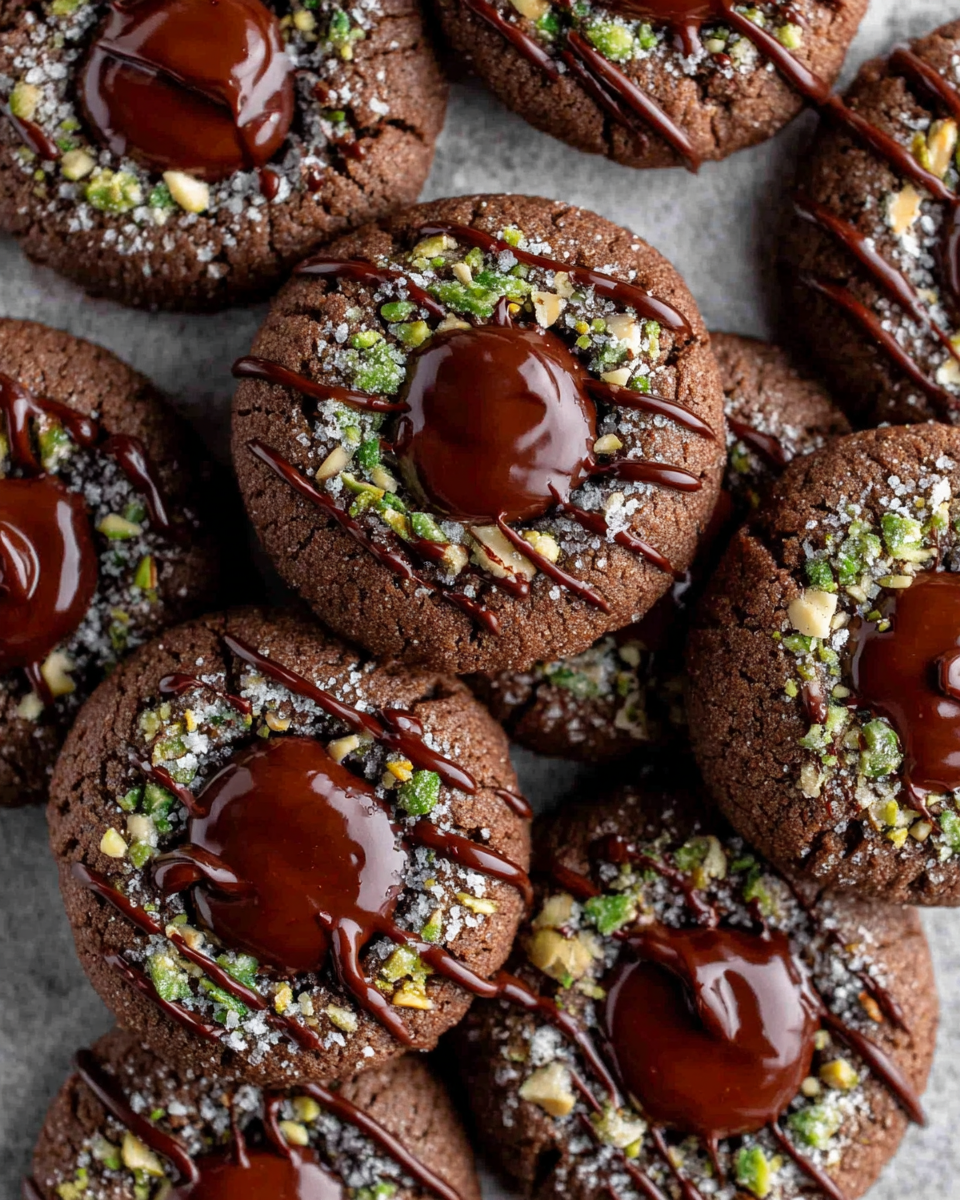
The fruit jam in the thumbprint creates a burst of flavor and sweetness, contrasting with the rich chocolate base. It also adds moisture to each bite, keeping the cookies from being overly dry.
Directions & Preparation
Step 1: Preheat your oven to 350°F (175°C).
Preheating the oven allows for an even baking temperature from the start, ensuring that the cookies bake uniformly. This step helps in developing the proper texture and prevents uneven cooking, so your cookies come out just right.
Step 2: In a bowl, whisk together flour, cocoa powder, baking powder, and salt.
Whisking these dry ingredients together ensures that they are well combined and evenly distributed. This step helps to prevent clumps, ensuring that each cookie has a consistent chocolate flavor and texture.
Step 3: In another bowl, cream together the softened butter, granulated sugar, and brown sugar until light and fluffy.
Creaming the butter and sugars incorporates air into the mixture, leading to a lighter cookie texture. This step is crucial for achieving that tender crumb and ensures that the sugars dissolve properly, resulting in a smooth batter.
Step 4: Add the egg yolk and vanilla extract to the butter-sugar mixture and mix until well combined.
Incorporating the egg yolk and vanilla at this stage introduces fat and moisture into the dough, which enhances flavor and creates a cohesive mixture. Ensure that these ingredients are well blended for a uniform taste.
Step 5: Gradually add the dry ingredients to the butter mixture, mixing until just combined.
Mixing the dry ingredients in gradually prevents overworking the dough, which could lead to tough cookies. You want to combine them until there are no visible flour pockets but retain a soft and slightly sticky texture.
Step 6: Scoop out tablespoon-sized portions of dough and roll them into balls.
Rolling the dough into balls creates a uniform size, ensuring even baking. This step is also essential for creating the distinctive thumbprints; the size should be consistent for a balanced look and texture in the finished cookies.
Step 7: Place the dough balls on a parchment-lined baking sheet, spacing them about 2 inches apart.
Spacing the cookies appropriately on the baking sheet prevents them from merging into one another as they expand during baking. The parchment paper also helps with easy removal and ensures that the bottoms do not burn.
Step 8: Use your thumb or the back of a spoon to create an indentation in the center of each ball.
Creating an indentation is what sets these cookies apart and holds the jam filling. Make sure the indent is deep enough to accommodate the jam but not so deep that it reaches the baking sheet.
Step 9: Fill each indentation with about 1/2 teaspoon of fruit jam.
Filling the thumbprints with jam before baking allows the fruit flavors to meld with the chocolate. This contributes to a lovely burst of flavor in each bite, making it a standout cookie.
Step 10: Bake in the preheated oven for about 10-12 minutes.
Baking time depends on your oven, so keep an eye on the cookies. They should look slightly puffed and set, with a soft center. Overbaking can result in dry cookies, so aim to remove them when they are just firm enough on the edges to avoid turning them hard.
Step 11: Allow the cookies to cool on the baking sheet for 5 minutes before transferring them to a wire rack.
Cooling the cookies on the baking sheet helps prevent them from breaking apart during transfer. It allows them to set further, maintaining their shape while the jam remains slightly melty, ready to enjoy.

Choosing the Right Jam
The choice of jam for your thumbprint cookies can greatly influence the flavor profile of your treats. Raspberry jam complements the rich chocolate beautifully, bringing a tart contrast that brightens every bite. Apricot is another excellent choice, offering a sweet and floral note. Experimenting with different jams, like blueberry or even lemon curd, can take your cookies to exciting new levels.
The Importance of Room Temperature Ingredients
Using room temperature ingredients like butter and eggs is crucial for a successful cookie dough. This practice allows for better incorporation of the ingredients, resulting in a smoother batter and more even texture in the baked cookies. It also helps the dough blend together more seamlessly, reducing the risk of any clumping or uneven baking.
Why Parchment Paper Matters
Using parchment paper on your baking sheet not only prevents cookies from sticking but also promotes even baking. Parchment creates a barrier from direct heat, resulting in cookies that bake uniformly without burning on the bottom. It's an easy step that can make a significant difference in achieving perfectly baked cookies.
FAQs
What should I do if my cookies spread too much during baking?
If your cookies spread excessively, consider chilling the dough for about 30 minutes before baking. This helps firm up the fat and keeps the cookies from spreading too thin.
Can I use a different type of chocolate in the recipe?
Yes! You can substitute unsweetened cocoa powder with a different type, such as Dutch-processed cocoa to achieve different flavor nuances. Adjust the sugar levels if using sweetened varieties.
What if the dough feels too dry when mixing?
If the dough feels too dry, you may add a teaspoon of milk or water to help bind the mixture together. Ensure not to add too much, or it could lead to overly soft cookies.
Can I decorate these cookies after they cool?
Absolutely! Once cooled, you can drizzle melted chocolate or a simple icing over the cookies for an added decorative touch.
How can I make these cookies more chocolatey?
To enhance the chocolate flavor, consider adding chocolate chips to the dough, or you can dip the finished cookies in melted chocolate for an extra rich treat.
What can I do if my jam is too chunky?
If your jam is too chunky for filling, consider blending it briefly in a food processor or microwave it slightly to make it easier to spoon into the thumbprints.
Conclusion
Chocolate thumbprint cookies are a delightful and versatile treat that caters to various tastes. Their soft, chewy texture combined with a burst of flavor from the jam creates a symphony of taste that satisfies chocolate lovers and fruit enthusiasts alike.
As you explore this recipe, remember that baking is about creativity and personal touch. Don't hesitate to experiment with flavors and additions, turning this traditional cookie into your very own signature treat.
Recipe Card

Deliciously Simple Recipes from The Blond Cook
Ingredients
- 2 cups of uncooked pasta
- 1 cup of cherry tomatoes halved
- 1 cup of spinach fresh
- 2 cloves of garlic minced
- ½ cup of grated Parmesan cheese
- 2 tablespoons of olive oil
- Salt and pepper to taste
Instructions
- Boil the pasta according to package instructions until al dente.
- While the pasta cooks, heat olive oil in a large skillet over medium heat.
- Add minced garlic to the skillet and sauté for about 30 seconds until fragrant.
- Add the cherry tomatoes to the skillet and cook for 2-3 minutes until they begin to soften.
- Stir in the fresh spinach and cook until just wilted, about 1-2 minutes.
- Drain the cooked pasta and add it to the skillet, tossing everything to combine.
- Sprinkle in the grated Parmesan cheese, salt, and pepper, mixing well.
- Serve immediately, garnished with extra Parmesan or fresh herbs if desired.
Notes
Additional serving suggestions: pair with a crisp salad, garlic bread, or roasted seasonal vegetables for balance.
For make-ahead, prep components separately and assemble just before heating to preserve texture.
Taste and adjust with acid (lemon/vinegar) and salt right at the end to wake up flavors.


