Introduction
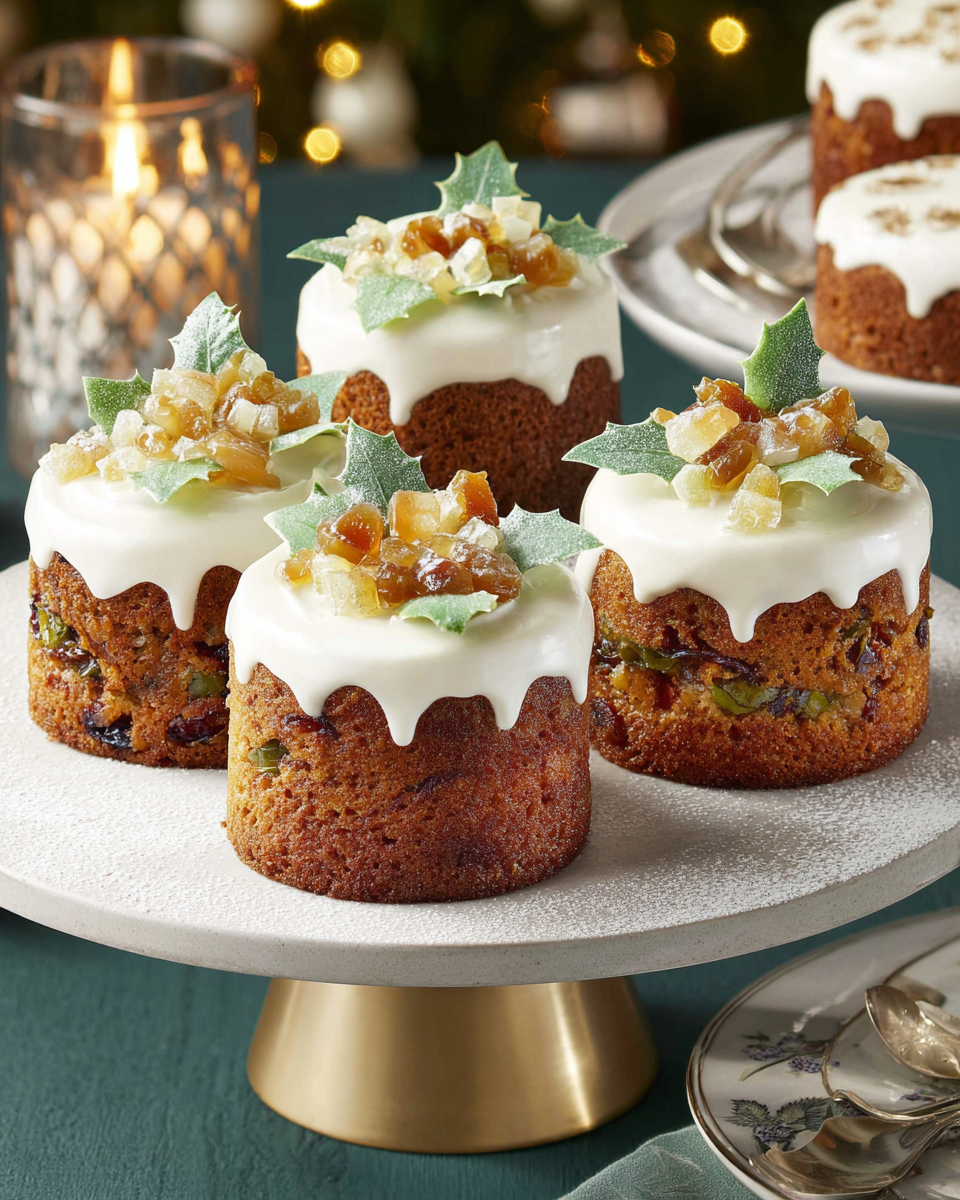
As the festive season approaches, the scent of spices and dried fruits fills the air, inviting us to indulge in traditional treats. Mary Berry's Mini Christmas Cakes offer a delightful blend of flavors and textures, perfect for sharing with loved ones or enjoying as a personal festive dessert.
These charming little cakes are not only visually appealing but also pack a punch in taste with their rich ingredients. Their small size makes them ideal for holiday gatherings, where everyone can enjoy a slice without the guilt of overindulging.
Ingredients
- 200g mixed dried fruits
Mixed dried fruits add natural sweetness and chewiness to the cakes. They provide a burst of flavor and texture, making each bite delightful. - 50g chopped walnuts
Chopped walnuts introduce a crunchy contrast to the soft cake, along with a slightly bitter note that balances the sweetness of the fruits. - 100g unsalted butter, softened
Butter enriches the cake's texture and flavor, giving it a moist crumb. It also helps in binding the ingredients together for a cohesive bake. - 100g light brown sugar
Light brown sugar brings a deep caramel flavor, enhancing the overall taste of the cake. It also contributes to the moisture, creating a luscious texture. - 2 large eggs
Eggs are crucial for structure, providing stability to the cake. They add richness and moisture, helping to create a tender crumb. - 150g self-raising flour
Self-raising flour simplifies the baking process by already incorporating a leavening agent. It ensures the cakes rise nicely, creating a light and airy texture. - 1 tsp mixed spice powder
Mixed spice powder infuses the cakes with warm, aromatic flavors. It captures the essence of the holiday season, bringing about a cozy, festive aroma. - 50g marzipan
Marzipan, a sweet almond paste, adds a smooth layer of flavor and texture once the cakes are decorated. It pairs beautifully with the fruitiness of the cake. - 50g icing sugar
Icing sugar is used for decoration, providing a sweet finish to the cakes. It creates a charming look that complements the festive spirit of mini Christmas cakes.
Directions & Preparation
Step 1: Preheat your oven to 150°C (300°F). Grease and line the mini cake tins.
Preheating the oven is essential for ensuring that your cakes rise and bake uniformly from the start. Lining the tins with parchment paper prevents the cakes from sticking, allowing for easy removal once baked.
Step 2: In a mixing bowl, cream the softened butter and light brown sugar until pale and fluffy.
Creaming the butter and sugar properly incorporates air, which contributes to the cake's light texture. The mixture should turn pale, indicating that enough air has been whipped in, aiding in achieving that perfect rise in the oven.
Step 3: Add the eggs one at a time, beating well after each addition.
Incorporating the eggs gradually allows for better emulsification, leading to a smoother batter. This process ensures that the fats and liquids combine well, which is key to achieving a moist cake.
Step 4: Fold in the self-raising flour and mixed spice powder gently.
Folding the flour mixture protects the air you’ve previously whipped into the batter. It ensures that you don’t overwork the mixture, which can result in a dense cake instead of a light, airy one.
Step 5: Stir in the mixed dried fruits and chopped walnuts until evenly distributed.
This step ensures that every mini cake gets an even amount of fruit and nut, providing delightful bursts of flavor in each bite. It also adds texture, enhancing the overall eating experience.
Step 6: Divide the batter between the prepared mini cake tins and smooth the tops.
Evenly distributing the batter ensures that each cake bakes uniformly, avoiding any risk of overcooking or undercooking. Smoothing the tops allows for even rising and a prettier finish.
Step 7: Bake for 30-35 minutes, or until a skewer comes out clean.
Baking at a low temperature allows the cakes to cook through without burning. Checking doneness with a skewer is key to ensuring the interior is fully baked without being dry. If it comes out clean, they're ready!
Step 8: Allow the cakes to cool in the tins for 10 minutes before transferring to wire racks.
Cooling them slightly in the tin helps to firm up the cakes for easier removal. Transferring to wire racks allows air to circulate, preventing sogginess from steam.
Step 9: Once cool, cover the cakes with a layer of marzipan and smooth icing sugar on top.
Covering with marzipan not only adds flavor but also provides a smooth surface for icing if desired. It also creates a delightful contrast to the rich fruit cake.
Step 10: Decorate as desired with festive decorations.
This step is where your creativity can shine. Whether it be traditional holly, edible glitter, or just a sprinkle of icing sugar, decoration enhances the festive spirit of your mini cakes and makes them visually appealing.

The Charm of Miniature Cakes
Mini Christmas cakes encapsulate the essence of holiday baking while offering a personalized touch. Their petite size allows for individual servings, making them perfect for festive gatherings. This charming aspect makes them an appealing addition to any dessert table, allowing hosts to present a variety of flavors in a manageable portion.
Flavor Variations and Additions
While the classic dried fruits and spices create a traditional taste, feel free to experiment with other ingredients. Adding chocolate chips or swapping out walnuts for pecans can offer a delightful twist. Creativity in flavor combinations can make these cakes uniquely yours, adding a personal flair to your holiday baking repertoire.
Perfecting Your Decoration Skills
Decorating mini Christmas cakes offers a fantastic opportunity to develop your skills and express your creativity. Experiment with different designs, from simple icing techniques to elaborate fondant decorations. This aspect not only enhances the cakes visually but also makes the baking process more enjoyable, allowing for a fun and festive family activity.
FAQs
What if the batter seems too thick?
If your batter is too thick, try adding a splash of milk to loosen it slightly. This can help create a smoother batter and ensure even baking.
Can I replace the nuts with another ingredient?
Yes, you can substitute nuts with seeds or omit them entirely if there's a nut allergy. Just ensure to maintain the balance in texture.
What can I do if my cakes sink in the middle?
Cakes may sink if they were undercooked or if the oven temperature was too low. Ensure to bake them until a skewer comes out clean and double-check your oven's calibration.
How can I make sure my cakes don't stick to the tin?
Thoroughly greasing and lining the tins with parchment ensures easy release. Dusting them lightly with flour after lining is also beneficial.
Can I use fresh fruit instead of dried for this recipe?
It's not recommended to use fresh fruit as it contains much more moisture and can affect the consistency and cooking time of the cakes.
What should I do if my mini cakes are too dry?
If the cakes turn out dry, consider brushing them with a bit of fruit juice or syrup before serving to add moisture. This can revive the flavor and texture.
Conclusion
Mary Berry's Mini Christmas Cakes are not just a festive treat; they encapsulate the spirit of the holiday season. Their charming size and rich flavors make them ideal for gatherings or as heartfelt gifts.
By mastering this recipe, you not only enhance your baking repertoire but also create lasting memories with family and friends as you celebrate the joys of the season. Happy baking!
Recipe Card

Simple and Delicious Meatloaf Cups for Every Cook
Ingredients
- 1 lb ground beef
- 1/2 cup breadcrumbs
- 1/4 cup milk
- 1/4 cup ketchup
- 1 small onion finely chopped
- 1 egg
- 1 tsp garlic powder
- 1 tsp salt
- 1/2 tsp black pepper
Instructions
- Preheat your oven to 350°F (175°C).
- In a large mixing bowl, combine all the ingredients.
- Lightly grease a muffin tin.
- Divide the meat mixture evenly among the muffin cups.
- Top each cup with a dollop of ketchup.
- Bake for 20-25 minutes or until cooked through.
- Remove from the oven and let cool for a few minutes.
- Carefully remove the cups from the muffin tin.
Notes
Additional serving suggestions: pair with a crisp salad, garlic bread, or roasted seasonal vegetables for balance.
For make-ahead, prep components separately and assemble just before heating to preserve texture.
Taste and adjust with acid (lemon/vinegar) and salt right at the end to wake up flavors.


